


How to DIY a French Manicure, Plus 10 Ideas to Try
November 02, 2023

What Are French Tips?
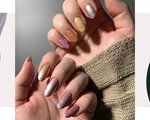
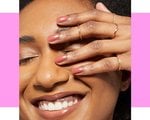
A classic French tip manicure involves a pale pink or nude base paired with a white line that’s painted over the natural white tip of your nail. However, there are plenty of ways to switch up a French tip manicure; for example, you can experiment with different colors, give a chrome finish a spin, add charms and accessories or play with different nail shapes.
How to Get French Tips in 4 Easy Steps
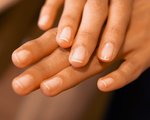
Step 1: Prep Your Nails
A long-lasting manicure starts with the right nail prep. Begin by cleaning your nails and making sure they're free of any traces of old nail polish, polish remover, water or oils. Next, you can buff, file and shape them as desired. In this guide on how to file your nails at home, owner of Lunula Salon, Tina Wang, recommends filing your nails in only one direction, rather than back and forth in a seesaw motion, in order to avoid breakage. Finish your nail prep by painting on a base coat, like the Essie Here to Stay Base Coat.
Step 2: Paint Your Base Color
Once your base coat is dry, it’s time to add the base polish color for your French tip. For the most classic French tip look, try a pale pink or nude polish. We love Essie Ballet Slippers, a barely-there, translucent pink, and Limo-Scene, a sheer cream shade.
Step 3: Add the Tips
Painting a French tip yourself can be tricky, but with a fine detailing brush (and a good amount of patience), it’s possible to get the look without a trip to the salon. Be sure to choose an opaque color you love (whether that be classic white or another hue of your choosing), and start by outlining the shape of your tip. Some artists recommend creating a guide by painting two lines on either side of the nail in a V shape, then filling in the space with polish to get that perfectly curved line, while others go straight for the curve. Find the method that works best for you by experimenting on one nail, and don’t be afraid to break out the nail polish remover if things go awry.
For a quick and easy visual demonstration, check out the tutorial below.
Step 4: Finish With Top Coat
Once your nail art is fully dry, lock in your hard work with a long-wearing top coat. Our editors recommend the Essie Gel Couture Top Coat, which will give your manicure a glossy, salon-worthy finish.